Modeling Pipeline
Note
Before you start anything, make sure that ftrack-connect is running.
Artist Workflow
Open a scene file
Once an artist is assigned a modeling task, the artist must navigate to the Ftrack task and open the Maya scene file from the actions menu.

When the application launches, the artist timer will start in Ftrack. This tracks the time the artist spends on the task.

The timer stops when the application is closed.
Modeling File Location
When the artist starts maya from ftrack, the corresponding asset’s model file will be launched. The file should be called <assetName_version>.mb and will be located at:
/data/production/<show>/assets/<assetType>/<assetName>/modeling/maya/
For example the location of a model file for asset ‘boy’ of type ‘character for project ‘test’ will be:
/data/production/test/assets/character/boy/modeling/maya/boy_v01.mb
Creating a Turntable
A turntable render is a great way to view the model along with it’s shading.
To create a turntable, first select a mesh by clicking on the asset in the viewport. Then click the turntable button in the LVFX_Modeling shelf.

This will create a camera and a 3 point light setup around the asset.
Naming Conventions
The asset must be grouped under a parent group. The parent group must have ‘_grp’ in it’s name. This group must have a child group with ‘_geo’ in it’s name. The ‘geo’ group must contain the meshes that constitute the asset.
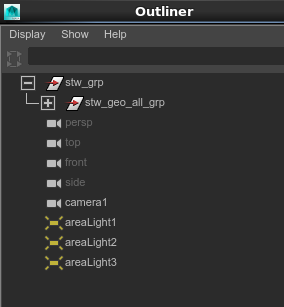
It is important to name the model and it’s parts correctly as these names will travel through the pipeline.
Publishing
When a model has to be made available to other departments, the artist must run a ‘Publish’ This can be done by selecting ‘Publish’ under the File menu in Maya.

The publish involves running a slew of validations. These validations include checking if the scene was opened via Ftrack, checking the file and model naming conventions, checking for locked normals, file history and so on. If a scene passes the validation checks, then the publish is run.
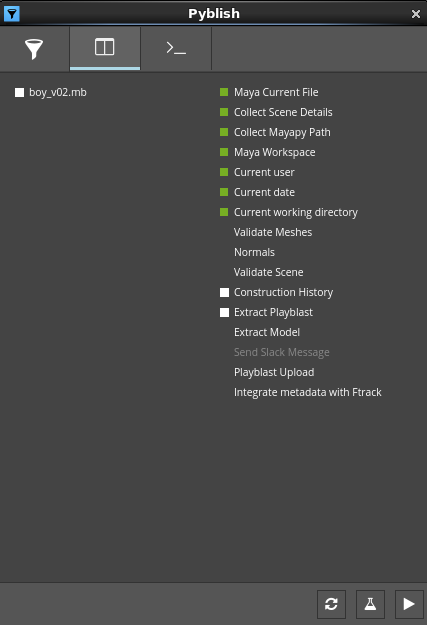

Press the ‘Play’ button shown above to run the validation and publish. If the validation fails, check the log and fix the scene. Then press the ‘refresh’ button and re-run the validation and publish.
The model in the scene is exported to a publish folder and renamed:
/data/production/<show>/assets/<assetType>/<assetName>/modeling/publish/assetName_ref.mb
This scene is now available to the downstream departments to use in their scenes. The corresponding ftrack task is updated with the publish data.