Render Management
Submitting Renders to the Farm
From Maya
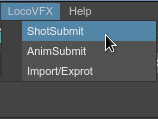
The shot_submit tool in Maya lets you submit VRay scene exports and VRay scenes for render on the farm. Select ShotSubmit in the LocoVFX menu. The Shot Submit GUI will open in the side tool bar.
VRay Exporter

This dialog submits a maya file on the farm to be exported as a vray scene file.
Let’s go over some of the parameters:
- Maya Filename: Full path of the maya file to be exported
- Render Layer: Select render layers. A new vray scene file is exported per render layer. If no render layer is selected, then by default the ‘masterLayer’ is exported.
- Camera: Select the correct render camera from the drop down menu.
- VRscene Filename: The name of the output vray scene file.
- Separate Frames: If checked, a vrscene file is exported per frame.
- Project Dir: Output directory of the VRay scene file.
For example:
Project Dir = /data/production/ftrack_test/shots/REEL3/REEL3_sh010/scene/lighting/
VRscene filename = REEL3_sh010_lighting
Render Layers = beauty, shadow
Output VRScene Files = /data/production/ftrack_test/shots/REEL3/REEL3_sh010/scene/lighting/beauty/REEL3_sh010_lighting.vrscene
and /data/production/ftrack_test/shots/REEL3/REEL3_sh010/scene/lighting/shadow/REEL3_sh010_lighting.vrscene
- Frame Split Mode: This must always be set to “No splitting”
- Chunk Size: This is always 0 as frame splitting is disabled.
- Client Pool: By default this is set to vray. You can also select ‘Linux Farm’ to render on any farm machine.
- Slack User: A message will be sent to this slack user when a render completes or fails. By default set to #render-updates channel. Can be replaced by the slack username.
VRay Standalone
Changing the Renderer option in the Shot Submit UI to VRay Standalone will change the render options.
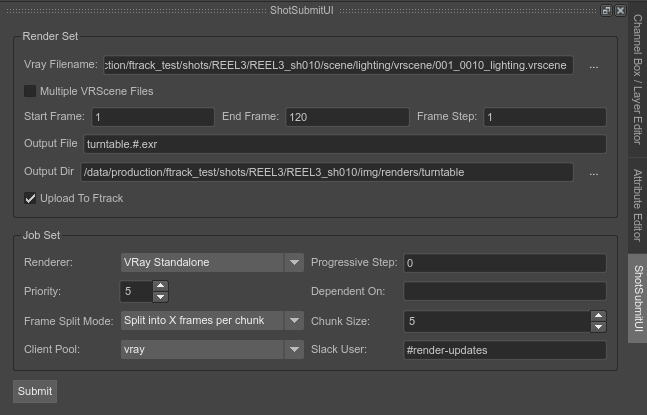
This dialog submits an exported VRay scene file on the farm for render.
Let’s go over some of the parameters:
- VRay Filename: The name of the VRay scene file.
For example:
For single VRScene File:
VRay Filename = /data/production/ftrack_test/shots/REEL3/REEL3_sh010/scene/lighting/beauty/REEL3_sh010_lighting.vrscene
For per frame VRScene files named REEL3_sh010_lighting.0001.vrscene, REEL3_sh010_lighting.0002.vrscene etc
VRay Filename = /data/production/ftrack_test/shots/REEL3/REEL3_sh010/scene/lighting/beauty/REEL3_sh010_lighting.#.vrscene
- Multiple VRScene Files: This is checked if VRScene files are exported per frame. If this is checked, the name of the VRScene must be formatted as shown in the example above.
- Output File: Name of the output file. eg. REEL3_sh010_beauty_v01.#.exr (The # is replaced by frame numbers on the farm)
- Output Dir: Output directory where the rendered images should be written.
- Upload to Ftrack: If checked, the output images are converted to a movie and uploaded to Ftrack.
- Frame Split Mode: Select “Split into X frames per chunk” so that the images are rendered on multiple render clients.
- Chunk Size: Default is 5. This means 5 frames will rendered per render client.
- Dependent On: If this job is dependent on another job, eg. A VRay Export job then type in the job ID of the vray exporter job here. The vray render will now run only after the vray export is complete.
- Progressive Step: In case you do not want the frames to render in a linear manner.
For example:
Progressive Step = 4, Total Frames = 10 and chunk size = 3
Chunk 1 will render frames 1, 5, 9
Chunk 2 will render frames 2, 6, 10
Chunk 3 will render frames 3, 7
Chunk 4 will render frames 4, 8
From command line
If you do not want to open Maya, you can also submit jobs for vray scene export and vray scene renders from the commandline.
vray_export:
usage: vray_export.py [-h] -scene SCENE [-proj PROJ] -start START -end END
                  [-step STEP] [-cam CAM] [-rl RL] -ex EX [-sep [SEP]]
                  [-user USER] [-group GROUP] [-priority PRIORITY]

Submits a VR Export Job to HQueue.

optional arguments:
  -h, --help          show this help message and exit
  -scene SCENE        Input Maya scene file
  -proj PROJ          VRScene output folder. Defaults to <maya scene
                      dir>/vrscene
  -start START        Start frame
  -end END            End frame
  -step STEP          Step
  -cam CAM            Camera to be rendered
  -rl RL              Render Layers to be rendered. Comma separated list
  -ex EX              Exported VRscene file name
  -sep [SEP]          Export separate vrscene files per frame.
  -user USER          Send post render to slack user
  -group GROUP        HQueue client group name
  -priority PRIORITY  HQueue render priority
vrscene_submit:
Usage:

vrscene_submit -v <vrscene> -i <imgFile> -f <firstFrame> -l <lastFrame> -s <step> -c <chunk>
               -m -g <group> -p <priority> -u <username> -r -d <jobID> -o <prog>
Submits vrscene file for render to hqueue

vrscene = Full filepath. When submitting multiple vrscene files, replace frame with #
eg. /data/production/ftrack_test/shots/REEL3/REEL3_sh010/scene/lighting/test.#.vrscene

imgFile = Full path to output img file
first = first Frame
last = last Frame
step = frame step. Default = 1
chunk = chunk size. Default = 5
multiple = multiple VR scene files. Default = False
group = name of group to submit to
priority = priority of job. 0 is lowest. Default is 0
slackuser = slack username. Default=#render-updates channel
review = Create movie and upload to ftrack. Default = False
dependent = Job ID of the dependent job
progressive = Progressive Step

 ---Multiple VRScene File Example---
vrscene_submit -v /data/production/ftrack_test/shots/REEL3/REEL3_sh010/scene/lighting/vrscene/stagBeetleTest_#.vrscene
               -i /data/production/ftrack_test/shots/REEL3/REEL3_sh010/scene/lighting/vrscene/renders/stagBeetleTest.#.exr
               -f 1 -l 15 -s 4 -c 5 -r -m

 ---Single VRScene File Example---
vrscene_submit -v /data/production/ftrack_test/shots/REEL3/REEL3_sh010/scene/lighting/vrscene/stagBeetleTest.vrscene
               -i /data/production/ftrack_test/shots/REEL3/REEL3_sh010/scene/lighting/vrscene/renders/stagBeetleTest.#.exr
               -f 1 -l 15 -s 1 -c 5 -r
From Nuke
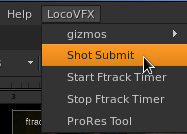
Nuke script files can be submitted for render on the farm. Open the Shot Submit UI by clicking on ‘Shot Submit’ under the LocoVFX menu.

Let’s go over some of the parameters:
- Filename: Full filepath of the nuke script file.
- Frame Range: Enter the frame range eg. 1-10. Leaving this black will render the entire.
- Write Node: Select a write node from the drop down menu
Monitoring the Render Farm
We use Houdini’s HQueue as our render farm manager. You can access the HQueue Server page at: http://192.168.0.153:5000
Monitoring with Slack
When a render completes, a message is sent on slack by default to #render-updates channel. The message includes the jobID of the completed job and the success/failure status.
If the job has failed, you can use slack to retrieve the failed jobs as well as the output log. This is especially useful if you are at home and do not have access to the Hqueue page.
To query failed jobs, send a direct message to @renderbot on slack. The slack account is: https://locovfx.slack.com
Type in the following command:
@renderbot: getFailed <jobId>
where jobId: Parent job ID
In response you should get a list of failed jobs child jobs
You can now get an output log of one of the child jobs to understand why the render failed.
Type the following command:
@renderbot: getLog <jobId>
This will return the output log for that jobID.